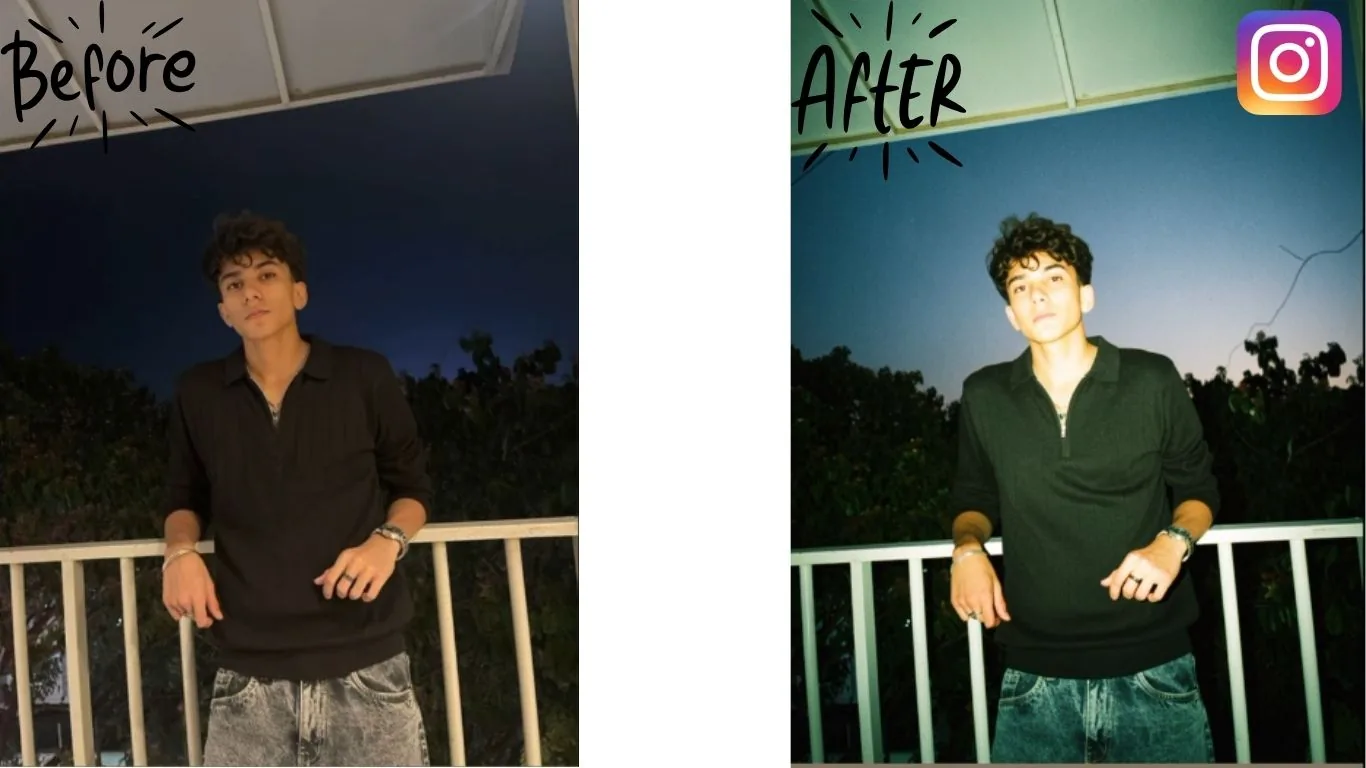
How to Get That Trendy 'Flash Effect' on Instagram Photos
Have you noticed those super cool, high-energy photos blowing up your Instagram feed lately? They have that edgy, professional direct-flash look that makes almost any picture feel more dramatic, modern, and scroll-stopping. The best part is that you do not need Photoshop or advanced editing skills. You can create this trendy Instagram photo effect in seconds right inside the Instagram app.
If you enjoy quick mobile edits, you can also explore our AI Filter tool for more stylized looks, or improve the final quality of saved images with our AI Image Upscaler. For a deeper look at image quality improvements, see our AI image enhancement guide.
Quick Answer
To get the trendy flash effect on Instagram photos, open Instagram, start a Story, upload your image, tap the pencil icon, and choose the Flash or Flash 3 effect. Then save the image to your phone before posting if you want to keep the edited version.
Table of Contents
Here Is the Quick Step-by-Step to Get the Look
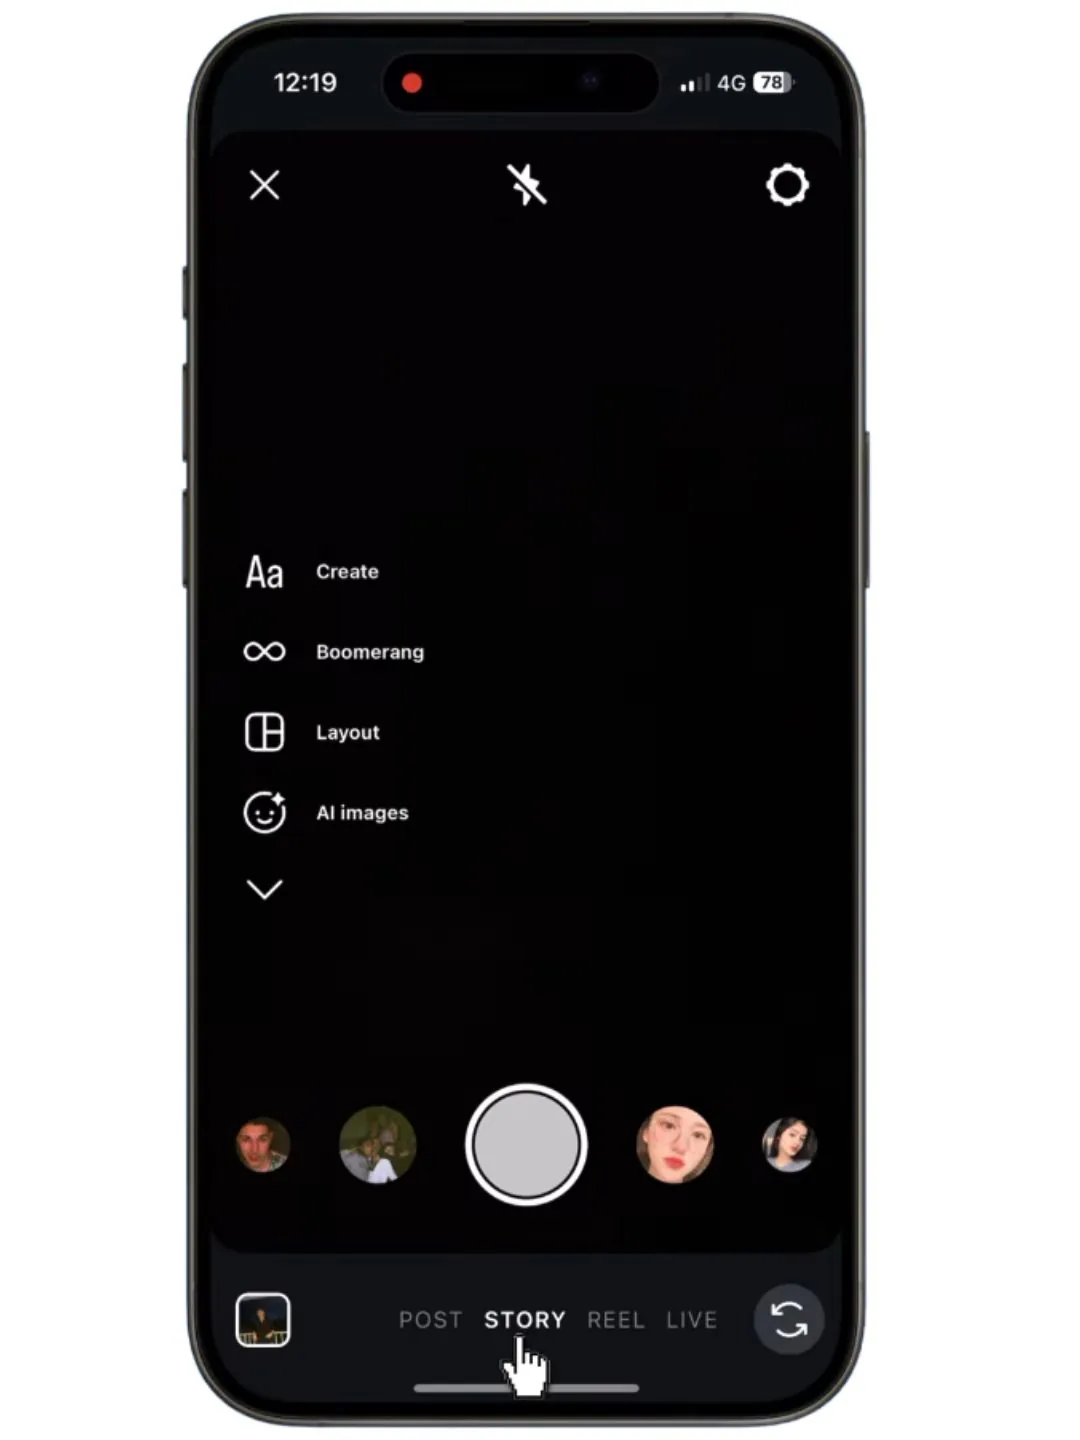
Open Instagram & Start a Story
Open your app and tap the + icon, then select the Story option.
Upload Your Photo
Choose the photo you want to level up from your gallery.

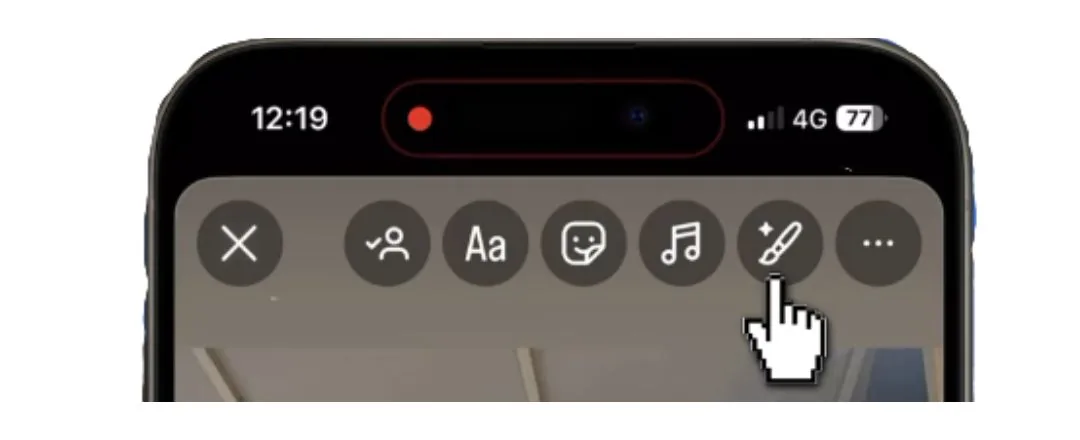
Use the Drawing Tool
Look for the pencil icon at the top of your screen and tap it.
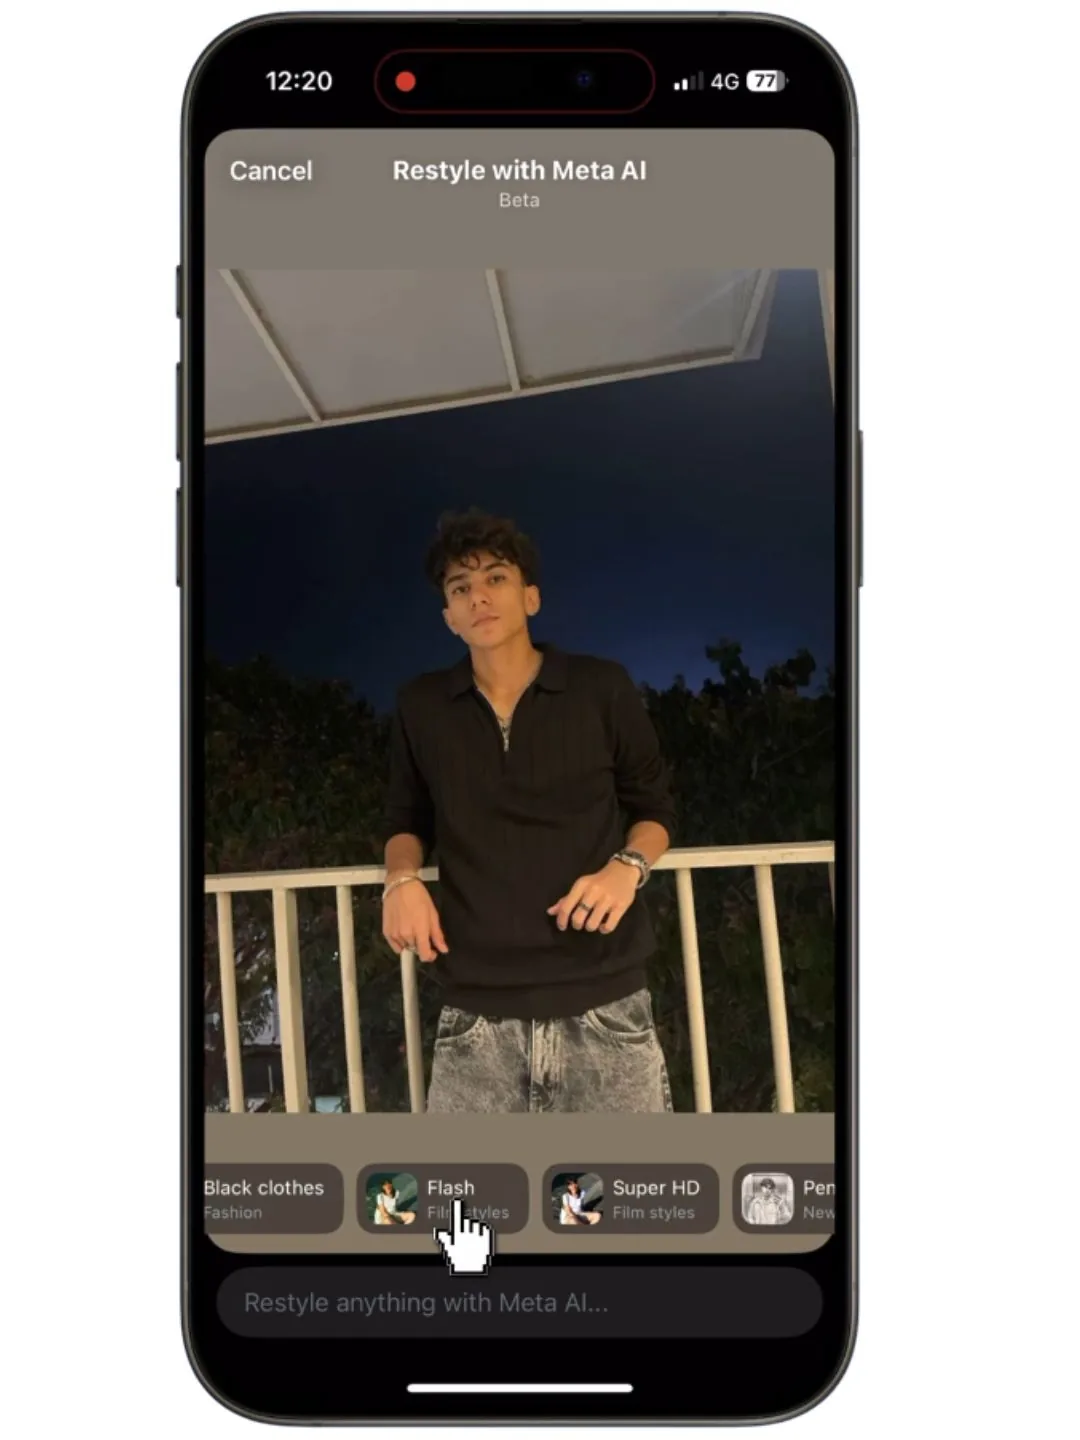
Pick the Right Filter
Swipe through the effects at the bottom. You are looking for two specific filters: Flash or Flash 3.
Apply and Post
Pick the one that fits your vibe, apply it, and you're done. Your photo will instantly get that trendy, bright, and moody aesthetic that is taking over the platform.
How to Save the Image
To save the image after applying the Flash or Flash 3 effect in the Instagram app, follow these steps:
- Apply the effect: After selecting the filter, the image will appear on the screen with the desired effect applied.
- Use the save option: Look for the three-dot icon or the downward arrow (Save option) located at the top of the Story editing screen.
- Save: Once you tap the Save option, the image will be downloaded directly to your phone's Gallery, allowing you to keep the edited version before publishing it.
If you want official platform help, you can also check the Instagram Help Center and the main Instagram website for current app features and updates.
Extra Tips for Better Results
- Use photos taken in slightly darker environments to make the flash effect stand out more.
- Test both Flash and Flash 3 because one may look better depending on your skin tone, background, and photo brightness.
- Save the edited image before posting so you can reuse it on Reels covers, Pinterest, TikTok, or other social media platforms.
- If the saved image looks a little soft, run it through our AI Image Upscaler to sharpen it for posting.
Frequently Asked Questions
How do I get the flash effect on Instagram photos?
Open Instagram, start a Story, upload your photo, tap the pencil icon, and choose the Flash or Flash 3 effect. Then save the image if you want to keep the edited version before posting.
What is the difference between Flash and Flash 3 on Instagram?
Both effects create a bright, trendy flash look, but Flash 3 usually gives a slightly different intensity and mood. The best option depends on your photo lighting, subject, and the overall vibe you want.
Can I save the Instagram flash effect photo without posting it?
Yes. After applying the effect, tap the Save option from the top of the Story editing screen. The edited image will download to your phone so you can keep it without publishing it.
Do I need a separate editing app to create this Instagram photo effect?
No. One of the main reasons this effect is popular is that you can create it directly inside the Instagram app in just a few seconds.
What type of photos look best with the Instagram flash effect?
Night photos, fashion shots, casual portraits, mirror selfies, and moody indoor photos usually look best with this effect because the bright flash styling creates more contrast and drama.